 Home
Home Forward
|
Home |
Forward |
PAGE 10
Saturday 10/11/03
|
5.0 hours |
I really accomplished something today.
And I decided to start adding a little bit more information at the suggestion of an A+ friend and Tech from work.
Don suggested I keep track of the time I had spent on each project. Great idea Don!
I have started "punching in" when I get to the shop. I wish I had started doing this from the beginning. It would be nice to have a running tab on the time I've spent.
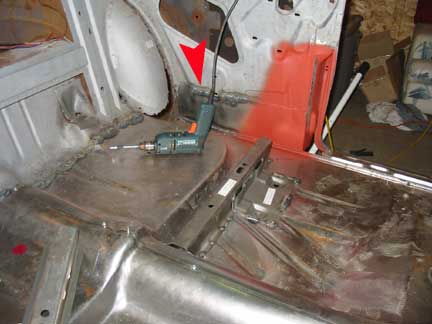
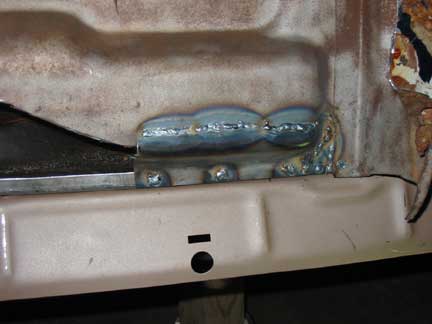
Two things to note here:
1. The area behind the B pillar and beneath the rear quarter window has been welded in place. (red arrow)
2. The rear seat riser and support brace on the drivers side has been welded in place.
The red color is red oxide primer I sprayed from a rattle can because that area will be difficult to spray once the B pillar support is in place.
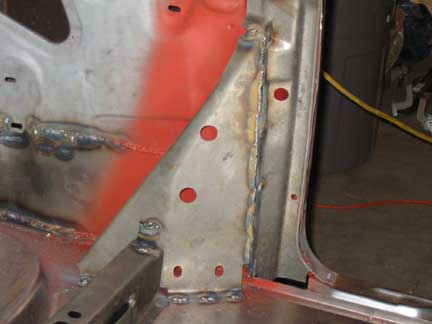
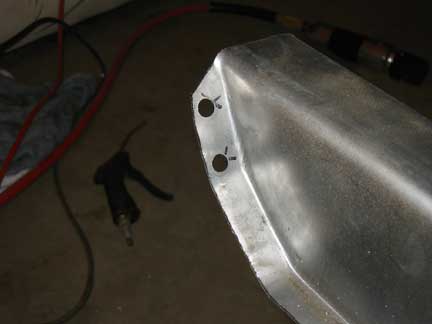
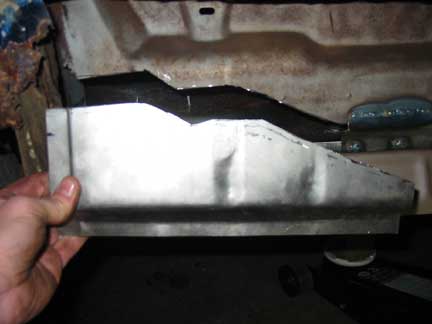
Here is the modified convertible B pillar support welded in, it fit just perfectly.
The drivers rear quarter is very solid now. Probably for the first time in many many years!

I should step back a bit and describe how I spot welded the seat risers in place.
This is the repro rear seat riser. Notice no holes to weld to the floor pan. The original is spot welded in several places.
The X's indicate where the spot welds should be.
Using a drill and bit would work well to make the needed holes, but.....
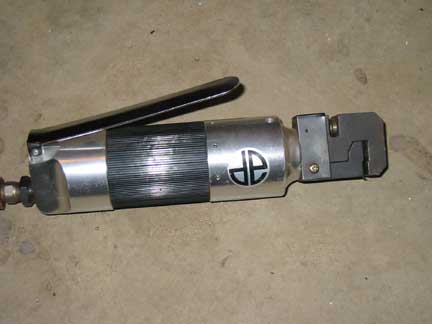
This tool borrowed from my brother Dan works better.
This air tool both flanges (the jaw on the bottom) but also makes perfect holes for spot welding (the top off the tool)
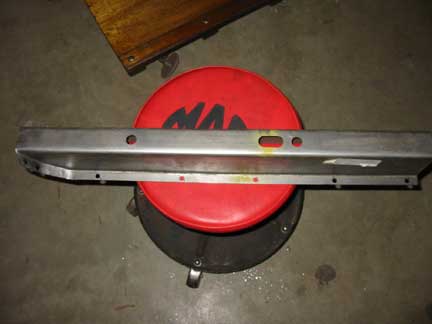
Same piece but X's are now perfect holes!
Isn't technology wonderful!
This made it so easy and very professional looking.
It's still gotta be welded in though.
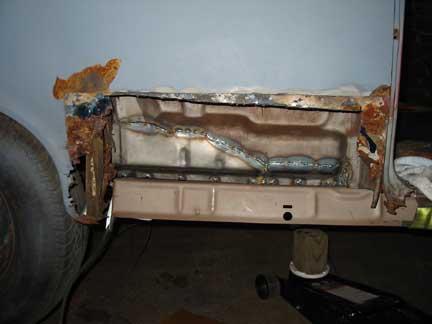
Here it is, the passenger side welded up. The welds may not be pretty but it all is very solid.
The welds keep looking better and better, it's been a long time since I've welded anything . I'm learning all over again.
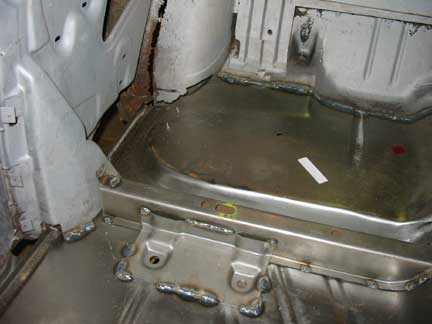
Well this is what I accomplished this afternoon.
The rear seat risers and floor pans are welded in place. The B pillar braces are welded to the floor pans and all seems to fit.
I really feel like a car builder and not a restorer at this point.
I'm going to get up early tomorrow to get to work on the old girl. I'll let you know what happens.
Sunday 10/12/03
|
5.5 hours |
My goal today was to get both front toe boards patched. Both sides were rusted at the bottom where they met the floorboards.
As I showed you earlier on I had purchased a reproduction toe board for the passenger side.
All I needed was the lower 4-6 inches of it.
I cut what I needed from the new part using the old piece as a template.
As usual nothing fit perfectly and it needed to be modified and tweaked a bit. Once welded in it looks good.
One side down, one to go.
The area on the drivers side that needed repair was much smaller so I didn't buy a panel.
After I cut out the rust there was very good strong metal left.
Next step is to try and manufacture a patch piece for it.
I spent quite a bit of time making this from what was left over from the passenger side part.
I was so proud, it was a real pain getting the metal to bend and curve at the same time.
All I had to work the metal was a hammer, 4x4 block of wood and a couple vice grips.
With a little magic from electrical resistance the toe board is once again complete.
I'm really glad the welds will be hidden by the carpet though!
I had achieved what I wanted to accomplish but I had metalworking in my blood so I decided to tackle the last patch in the passenger compartment.
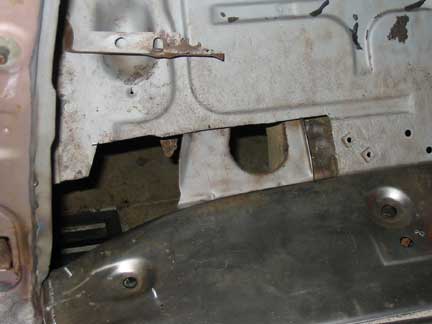
This is the passenger side directly behind the door opening.
As you can see the outer quarter has been cut away. What you see here is the inner quarter.
I had previously cut away the lower section of the inner quarter as it was all rusted through.
If you look back a page or two you'll see the similar condition on the drivers side.
Ok, I'm here dirty and the welders warmed up, let's do it!
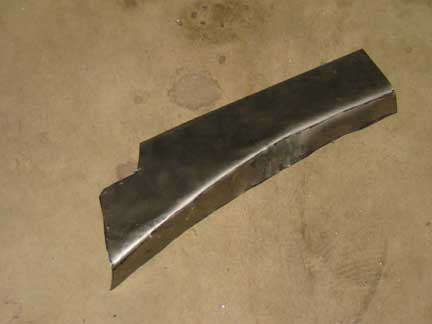
I manufactured a rounded piece for the front area of where the patching was needed.
This took quite a bit of time to get it to fit just right.
I'm sorry about the quality of this picture, the camera just refused to focus properly.
You can see however this is the rear part of the inner quarter.
I bleed a bit making this one.
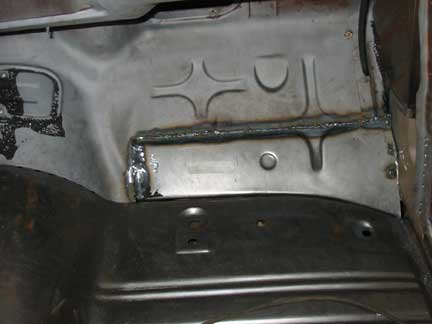
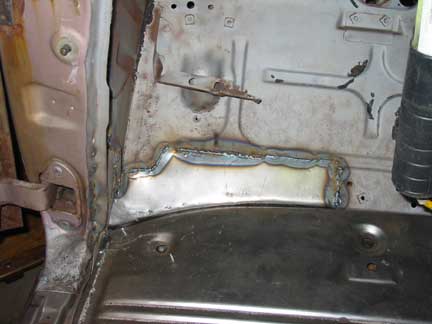
Here it is all melted together.
I'm really proud of the parts I made. Sad part is no one will probably ever see them again.
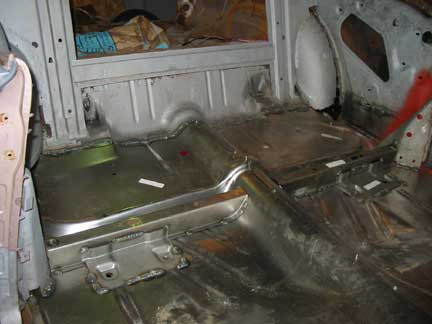
This is a view from the inside of the car.
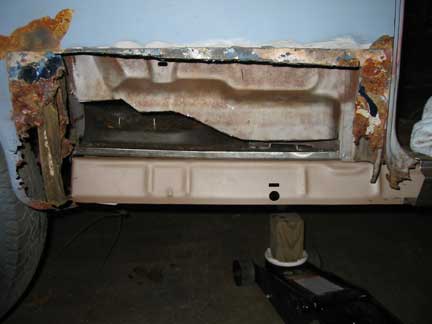
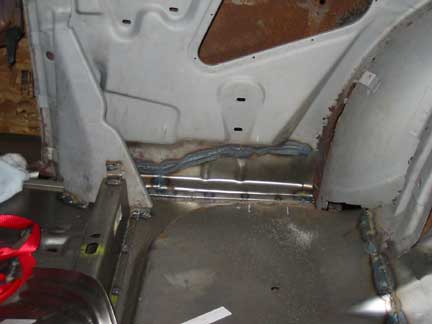
Another milestone, all the passenger compartment sheet metal has been repaired!
The inside of the car is as good as new.
Now it's on to the trunk and rear wheel well area. UGHHHHHH! It's going to be tough.
Stick around to see how it turns out.

Go to page 1 2 3 4 5 6 7 8 9 11 12 13 14 15 16 17 18 19 20 21 22 23 24 25 26 27 28 29 30 31 32 33 34 35 36 37 38 39 40 41 42 43 44 45 46 47 48 49 50
![]()
