1970 Triple Black 402 Big Block Monte Carlo
Resto Updated 7/29/2014
She is done!!!!!
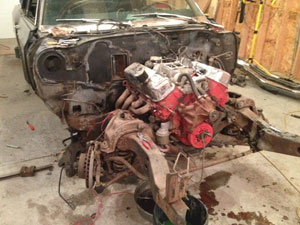
I found this 70 big block Monte and worked for awhile to buy it from
the owner. It had been sitting on blocks for a few years and
deteriorating.
It's a factory 402 big block automatic on the column car. The
motor and transmission have been recently rebuilt and balanced with
some mild performance upgrades.
Best of all it's nearly rust free, the floor and trunk are
completely solid!
It's going to need a complete interior, paint, new wheels, minor
rust repair and some minor mechanical repairs.
As much as I love it, I plan on restoring it and selling it to some
lucky new
owner.
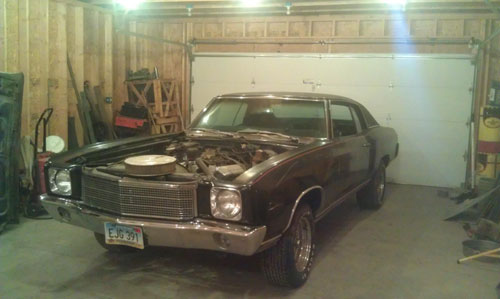
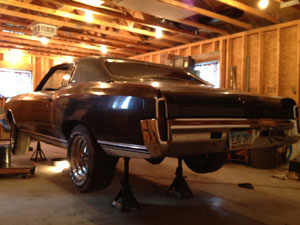
October 2012
Rolled her off the trailer,
put a battery in, some fresh gas
and the burnouts began!
God there's nothing like the sound
and feel of a big block Chevrolet!
Funs Over!
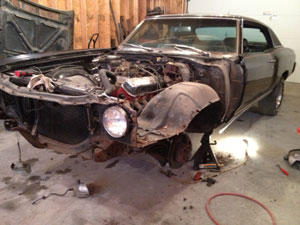
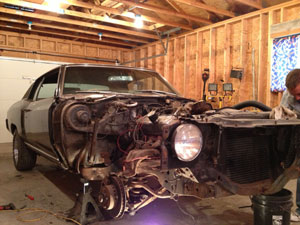
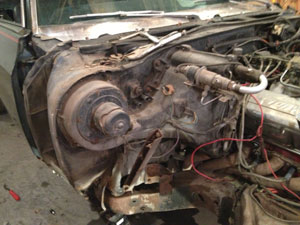
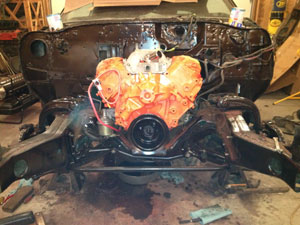
I'm going to begin by removing the front end.
This way I can repair a dent in the drivers fender, replace the inner
fender wells, clean and paint the firewall, repair some wiring, clean
and detail the motor and replace some suspension components.
November 4th 2012
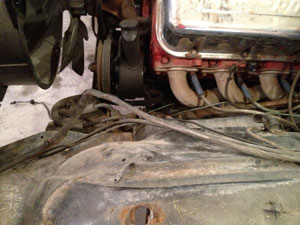
Not a lot off sexy work to report today. Much more
deconstruction. Removed were the the heater A/C box, steering box,
power steering pump, carb and various brackets and pulleys.
Man this thing looked a lot better before I got my grubby hands on
it!
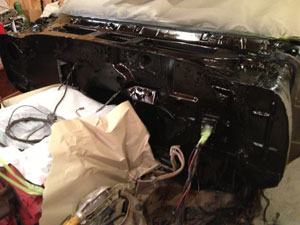
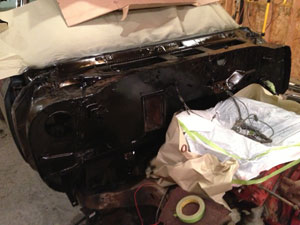
November 7th 2012
Firewall, cleaned scuffed and painted.
Looks good!
Several other small parts sandblasted and
painted.
I cant wait to start putting things back
together.
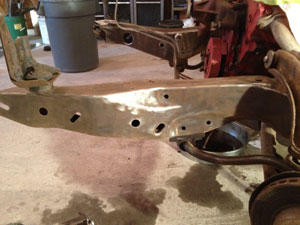
November 9th 2012
Hours of disassembly, painstaking wire brushing,
sandblasting and cleaning really paid off on the frame. Several coats of
paint and it looks like it was just factory produced!
Now it's just a matter of using a gallon of
shampoo and a pound of soap to get all the 40 year old dirt and rust dust off of
me!
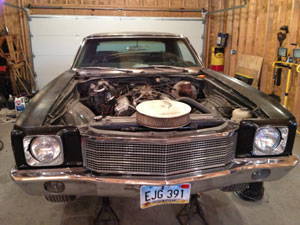
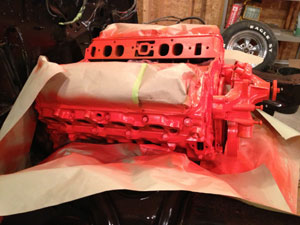
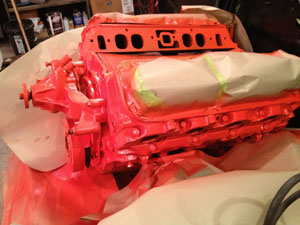
November 10th thru 25th, 2012
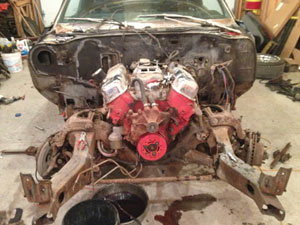
I got to make some things pretty the last couple weeks. A new
center link, new urethane tie rod end dust boots, cleaned and painted.
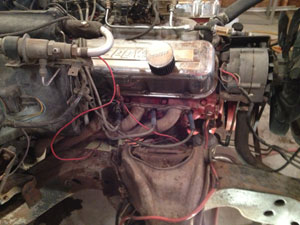
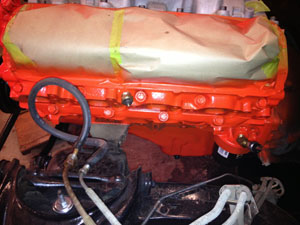
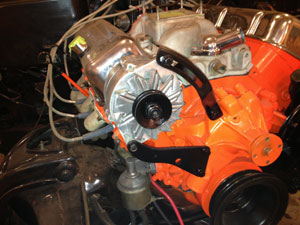
The motor stripped, cleaned and painted, oil pan removed stripped,
straightened and painted.
The starter was disassembled, rebuilt, cleaned,
painted and reinstalled. New battery cables, temperature sensors, checked
cleaned and reinstalled. New oil pressure sender and adapters, lower
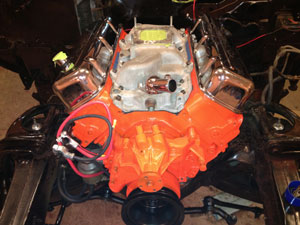
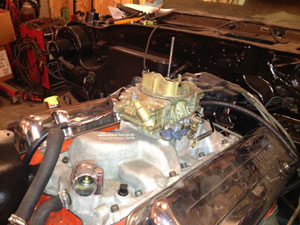
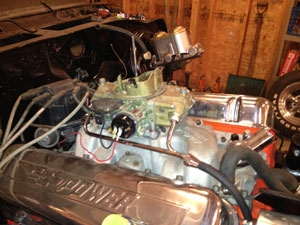
control arm bumpers and finally the intake cleaned up and reinstalled along with
the rocker covers set in place. WOW what a difference!
Couldn't help doing a little before and after!
November 29th, 2012
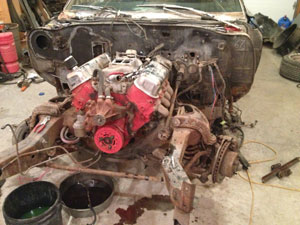
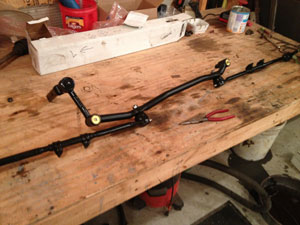
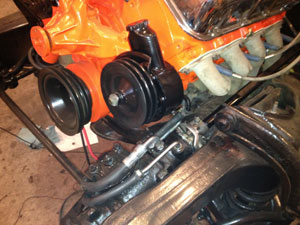
Quick update: As
you can see the power steering pump, hoses, steering sector, rag joint and
intermediate shaft have been brought back to new condition and reinstalled.
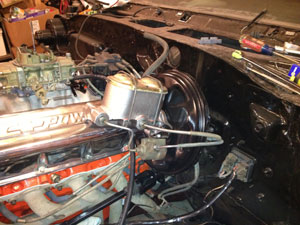
The alternator is rebuilt, polished a bit and reinstalled. The master
cylinder and brake booster were also reinstalled on the firewall.
It's really looking good
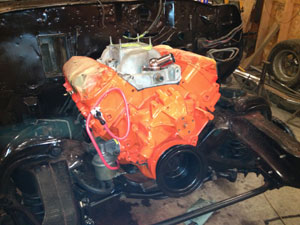
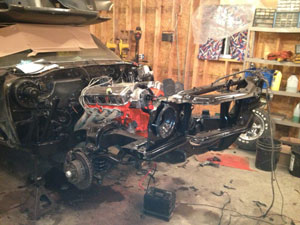
It was really exciting to begin putting the core support and
related parts back in place.
These parts took hours and hours to strip, clean, straighten a bit and
paint. It was all worth it!
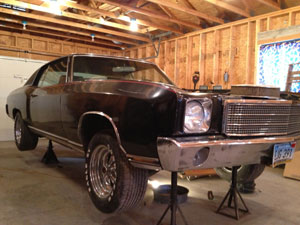
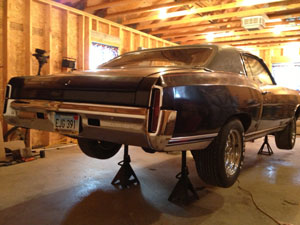
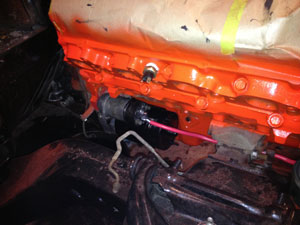
December 3rd, 2012
A shot of the master cylinder and brake booster,
look like new! Also I rebuilt the Holley 750, installed an automatic
choke, installed it on the intake and properly ran the fuel line.
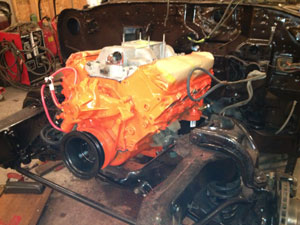
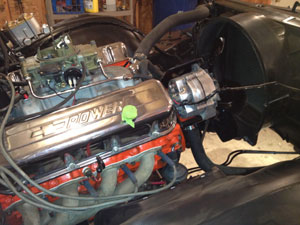
Radiator, fan shroud, transmission cooler
lines, radiator hoses, new inner fenders, electrical, belts, filled all fluids,
serviced the transmission and reattached the exhaust. She's ready to
rock!!!!!
Starting her up and letting her growl a bit!
It sounds so much better in person. Sorry for the quality, it was recorded
on a phone. I'm going to get a better video up soon.